The Yard Manoeuvres
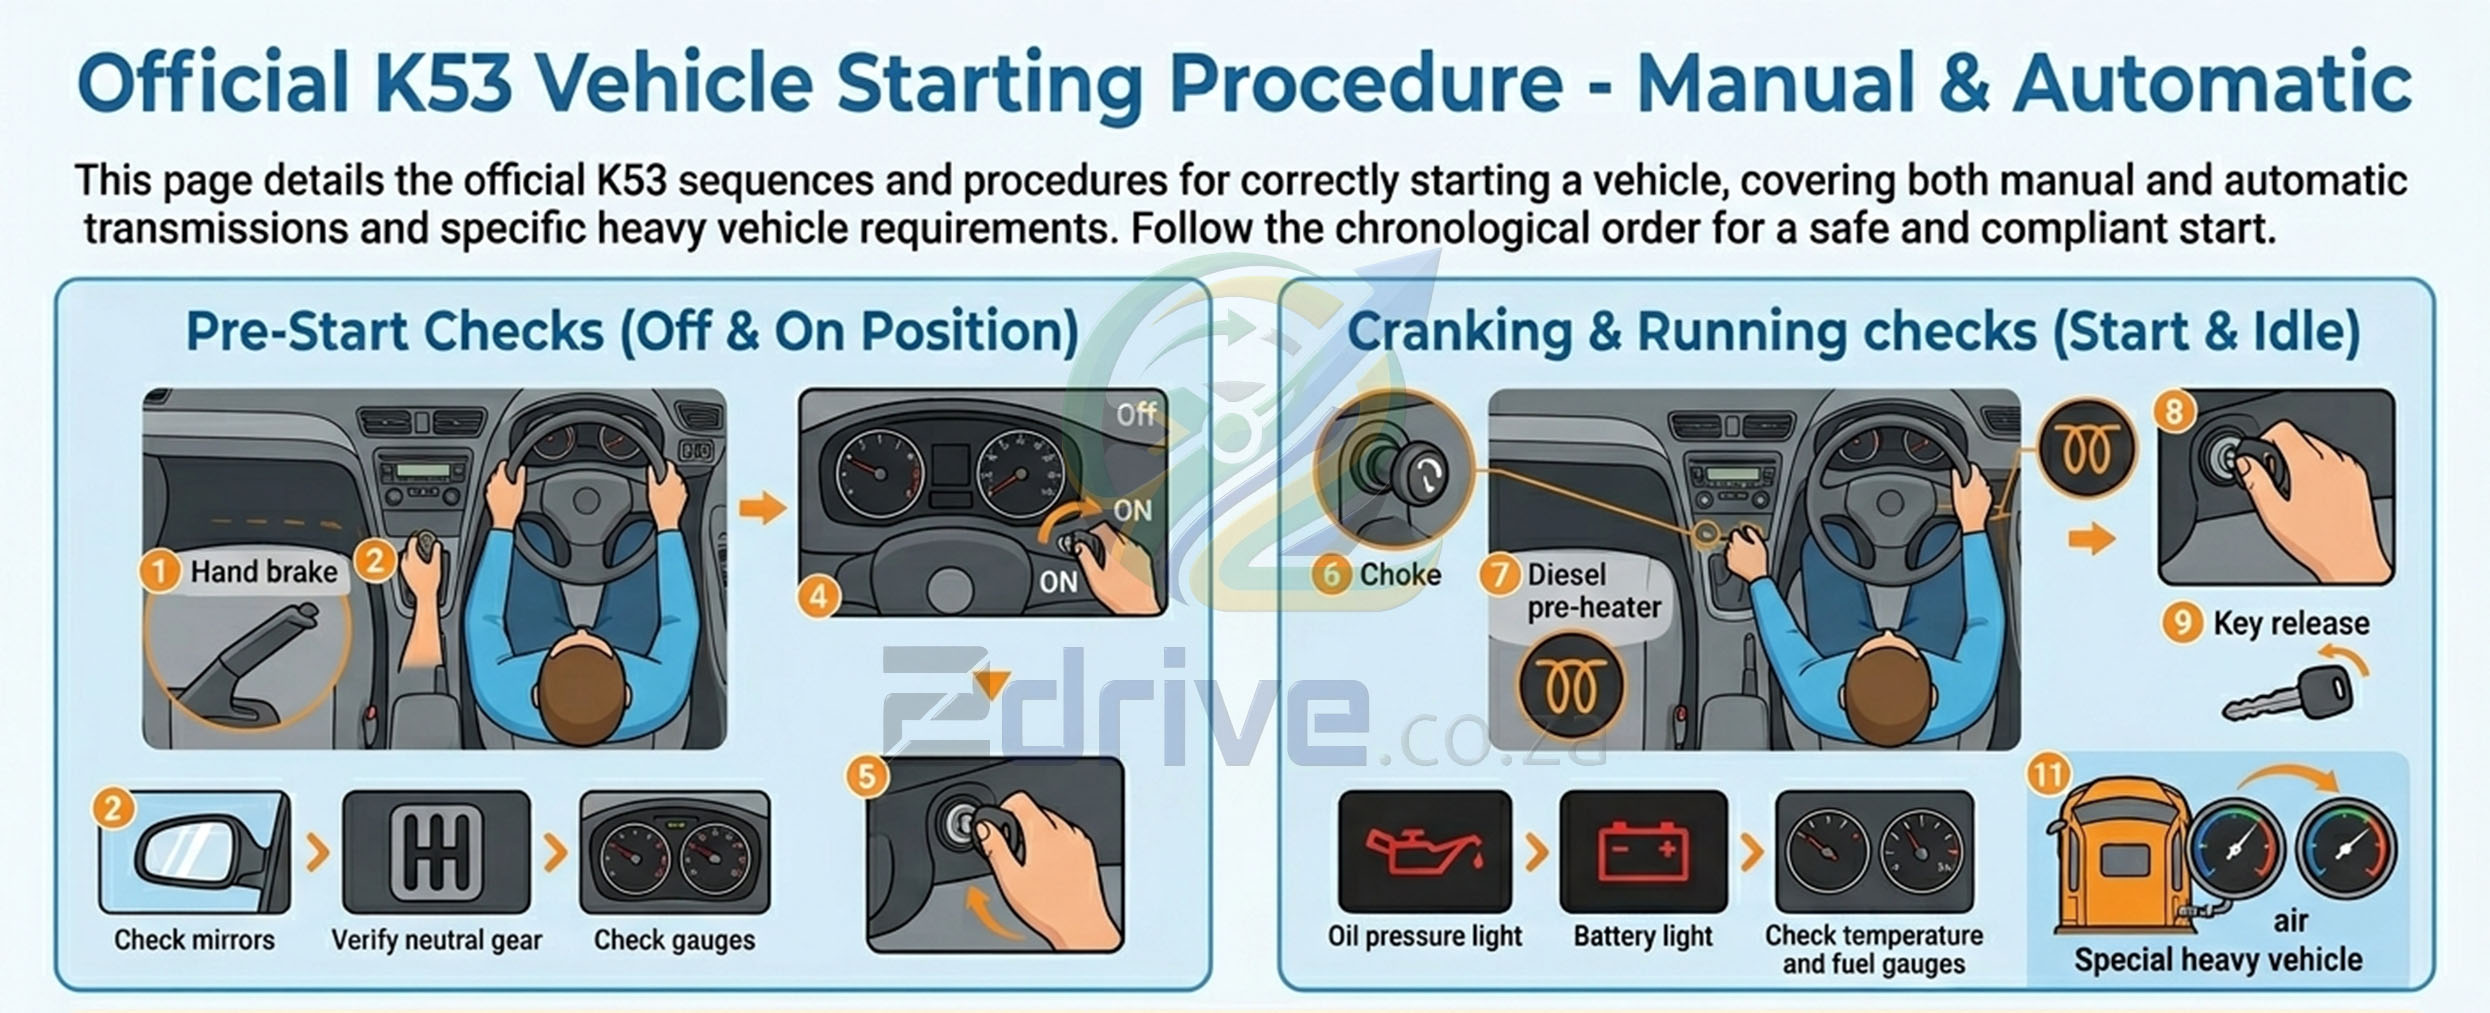
1. Ensure the Parking Brake is Applied:
Verify that the handbrake is firmly pulled up. The examiner needs to see you physically check or touch it to ensure the vehicle is secured and cannot roll.
2. Check Gear Lever is in Neutral / Park:
For a manual vehicle, ensure the gear lever is in the Neutral position (shake it gently from side to side to confirm). For an automatic vehicle, ensure it is in P (Park) or N (Neutral).
3. Check Gauges and Warning Lights (Off Position):
Before turning the key, glance at the instrument cluster. Verify that all gauges are at rest (zero/minimum) and all warning lights are dark. This establishes your baseline check.
4. Turn Ignition Key to the 'ON' Position:
Switch the ignition to the ON position (or press the start button once) without cranking the engine. This activates the vehicle's electrical circuit and fuel pump.
5. Check Warning Lights and Gauges for Malfunctions:
Observe the dashboard as the warning lights illuminate for their self-test. Wait a brief moment to ensure that specific lights (like the ABS or airbag system check) cycle correctly and turn off, showing no underlying faults.
6. Manage Choke Position:
If operating an older, carbureted vehicle: Apply the manual choke if the engine is cold, or ensure it is fully cancelled/pushed in if the engine is already warm. (Note: You can state "Not applicable" to the examiner if driving a modern fuel-injected vehicle).
7. Diesel Vehicles Only:
Turn the engine control switch to ON. Observe the pre-heater/glow plug warning light (coiled wire icon). You must wait until this light goes out completely before attempting to crank the engine, ensuring the cylinders are hot enough for combustion.
8. Turn Ignition Key Further to Start Engine:
Depress the clutch pedal fully (for manuals) or the brake pedal (for automatics) and turn the key to the START position to engage the starter motor.
9. Release Hold on Key Immediately:
As soon as the engine fires and starts running under its own power, release your grip on the key immediately so it springs back to the 'ON' position. This prevents damage to the starter motor and flywheel.
10. Check Lights and Gauges for System Malfunction:
With the engine now idling, check the dashboard one final time. Verify that critical operational indicators—specifically the oil pressure light, battery charge light, and engine management light,have turned off, and that the fuel gauge registers.
11. Heavy Vehicles Only:
If testing in a heavy commercial vehicle (Code EC1/EC), keep the vehicle stationary and let the engine idle. Monitor the air pressure gauges until the pressure builds up to its safe operating limit (usually indicated by the warning buzzer turning off and the needles settling in the safe zone).